Microsoft Dynamics 365 F&O : Unified Developer Experience (UDE) Setup Guide
6/15/2026 • 17 min read
A complete step-by-step walkthrough: from zero to deploying code in your UDE environment.
What is UDE?
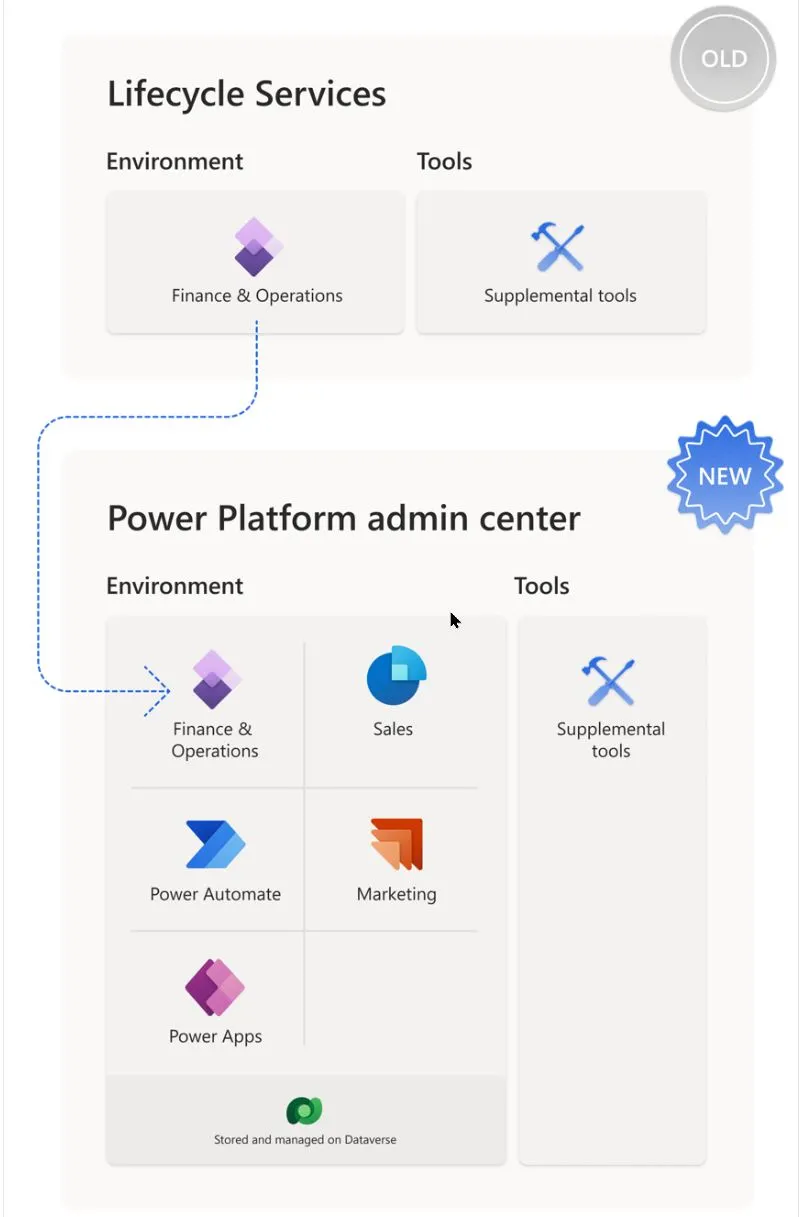
The Unified Developer Experience (UDE) replaces the old Cloud Hosted Environments (CHE) managed in LCS. Development now runs locally on your machine via Visual Studio 2022, connected to a cloud environment provisioned through the Power Platform Admin Center (PPAC) no more babysitting Azure VMs.
Phase 1 Prepare Your Toolkit
Step 1.1 Assign Required Admin Roles
Go to admin.microsoft.com and assign these three to your admin/service account:
- Power Platform Administrator
- Dynamics 365 Administrator
- Finance or SCM license
Pro tip: Use a dedicated admin/service account — not a personal one. Avoids disruption when team members change.
Step 1.2 Check Storage Capacity
UDE environments live inside Dataverse. Before creating one, verify you have enough capacity.
Where: PPAC → Licensing → Capacity
Check these three storage types:
| Storage Type | What it holds |
|---|---|
| Database | Transactional data |
| File | Attachments and documents |
| Log | Audit and system logs |
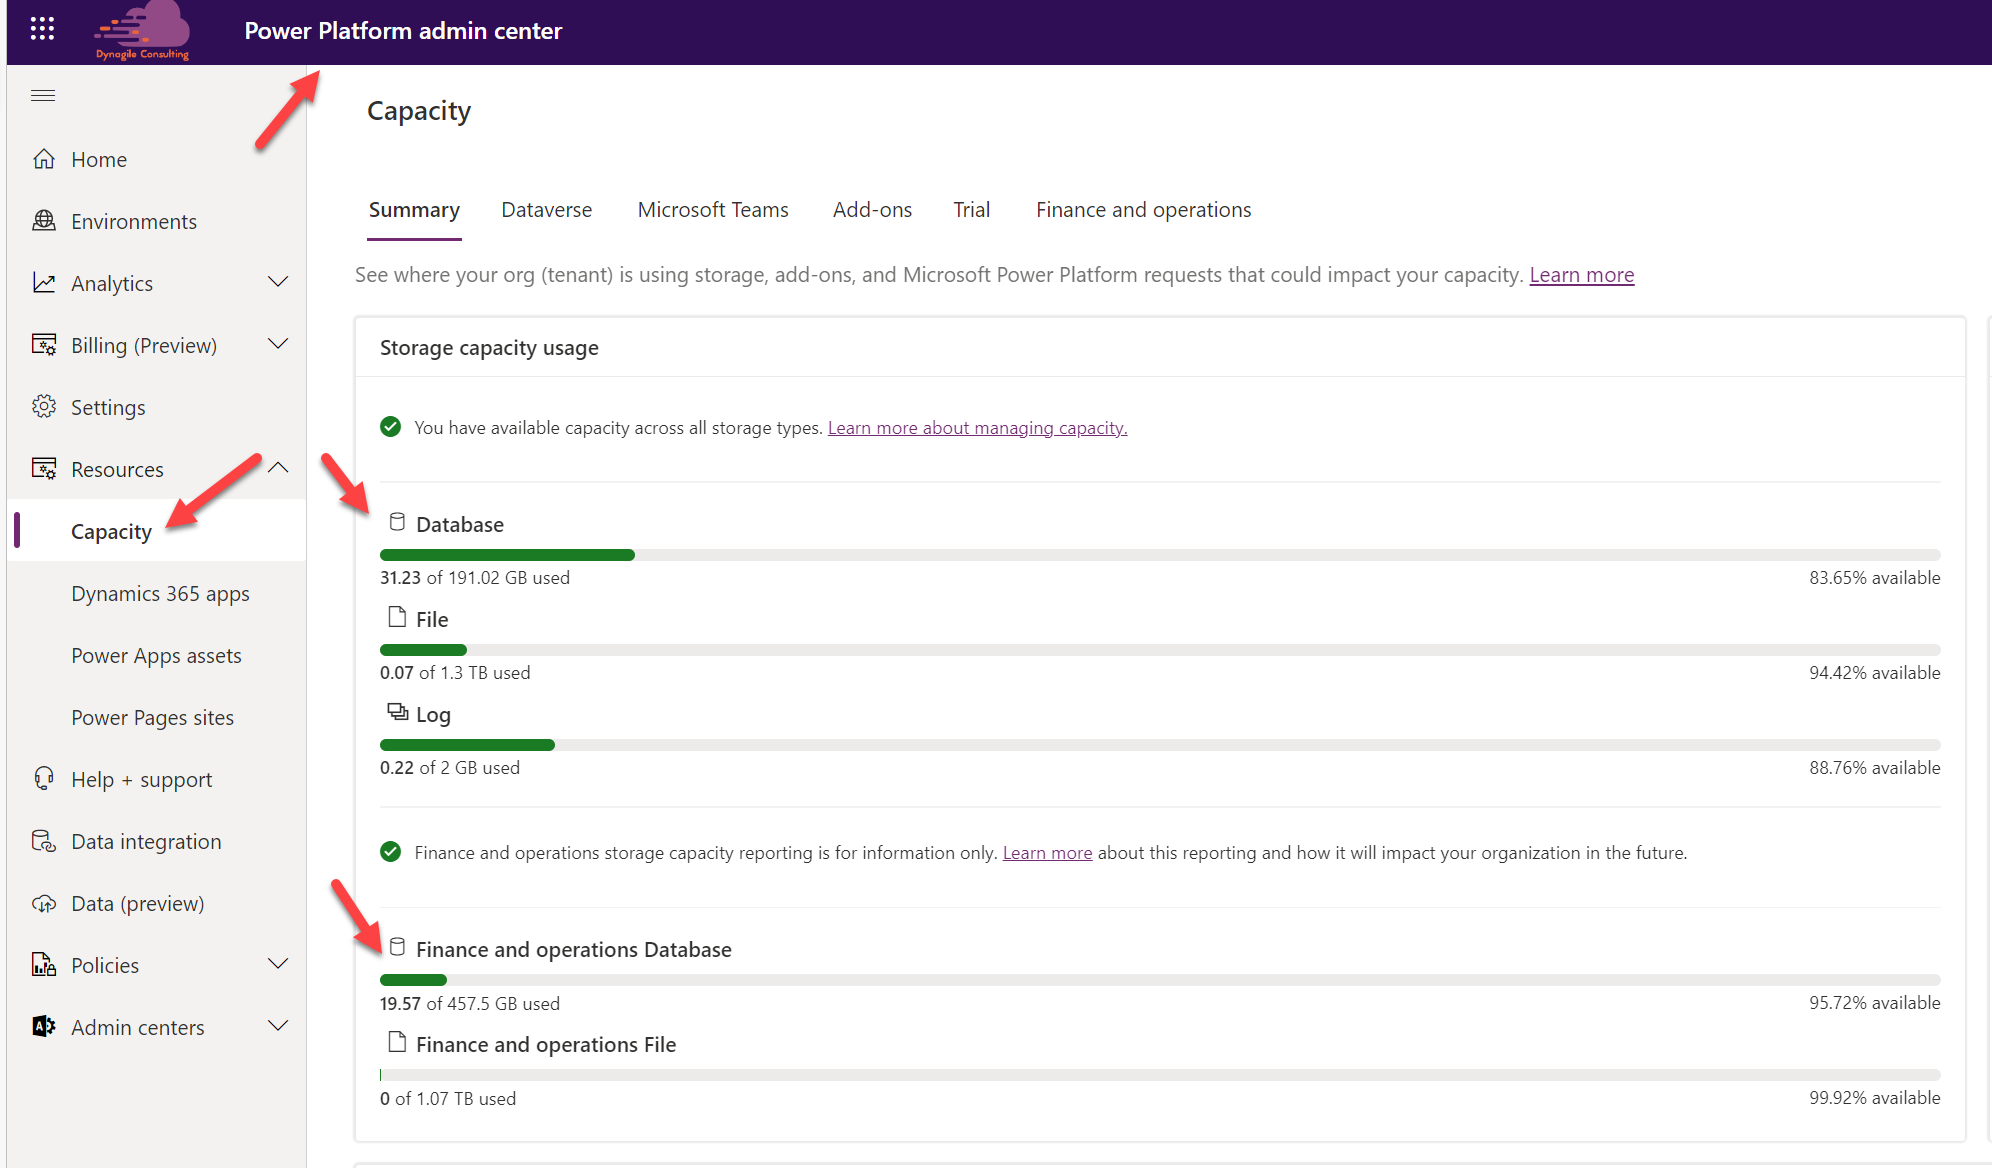
Note: Microsoft merged FO and Dataverse storage in December 2025.
Step 1.3 Set Up Visual Studio 2022
Install the following components in order:
Step A Modeling SDK & DGML Editor
- Go to:
Tools → Get Tools and Features → Individual Components - Search for and install:
Modeling SDKandDGML editor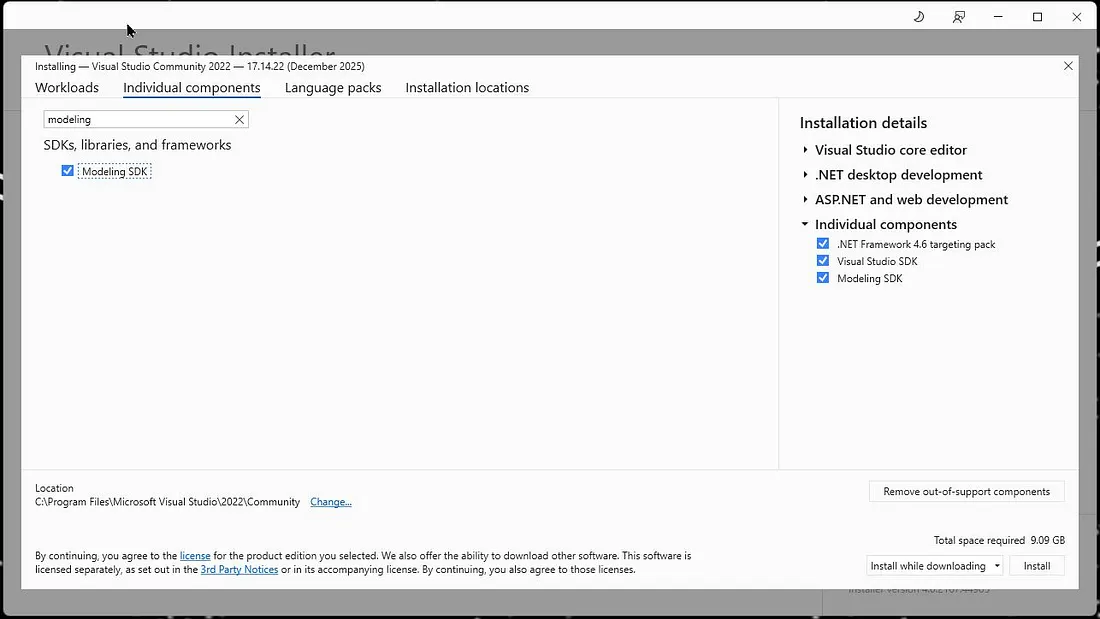
Step B .NET Desktop Development Workload
- In the same installer, switch to the
Workloadstab - Install:
.NET Desktop Development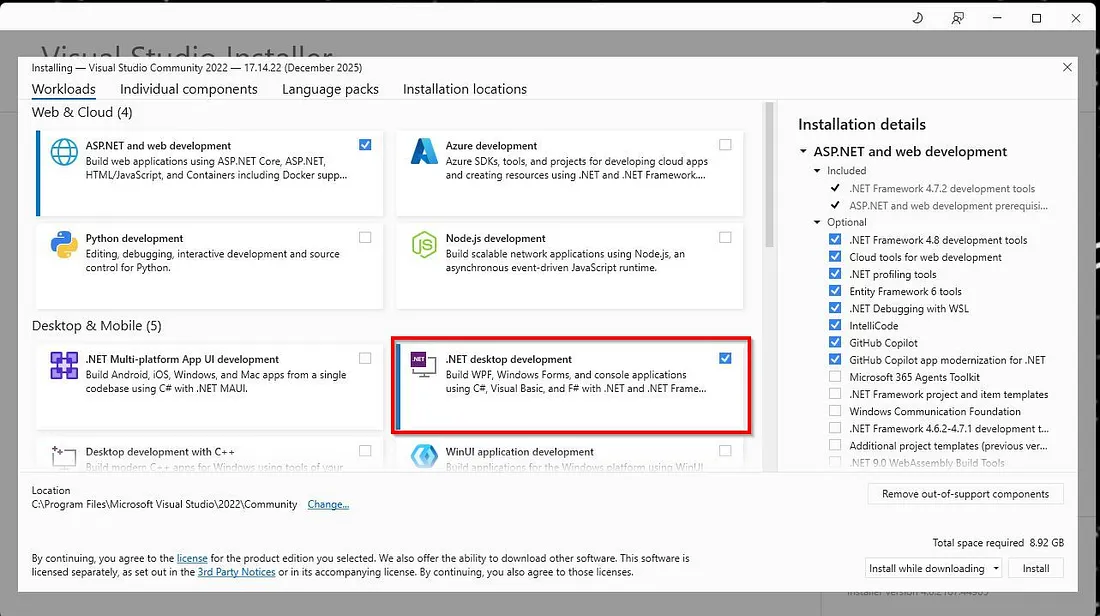
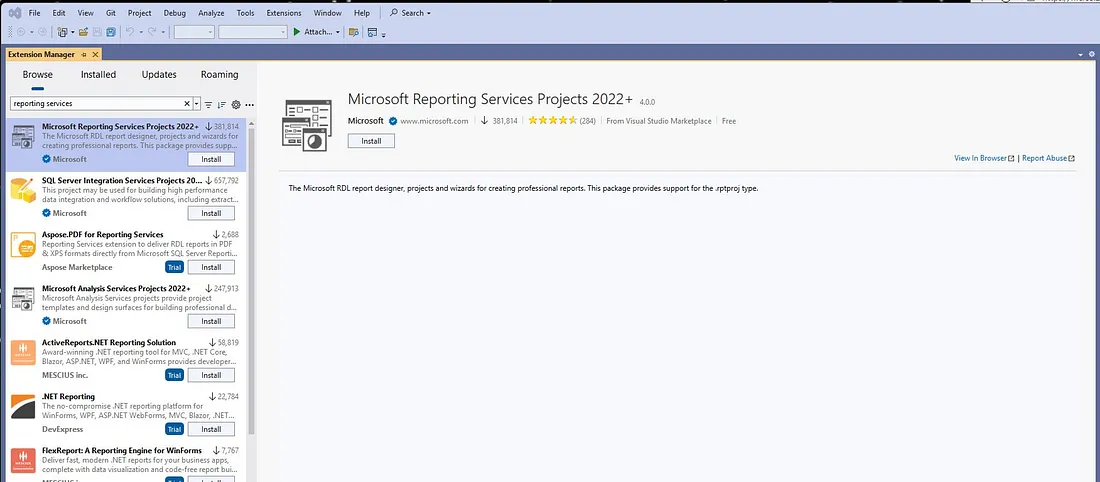
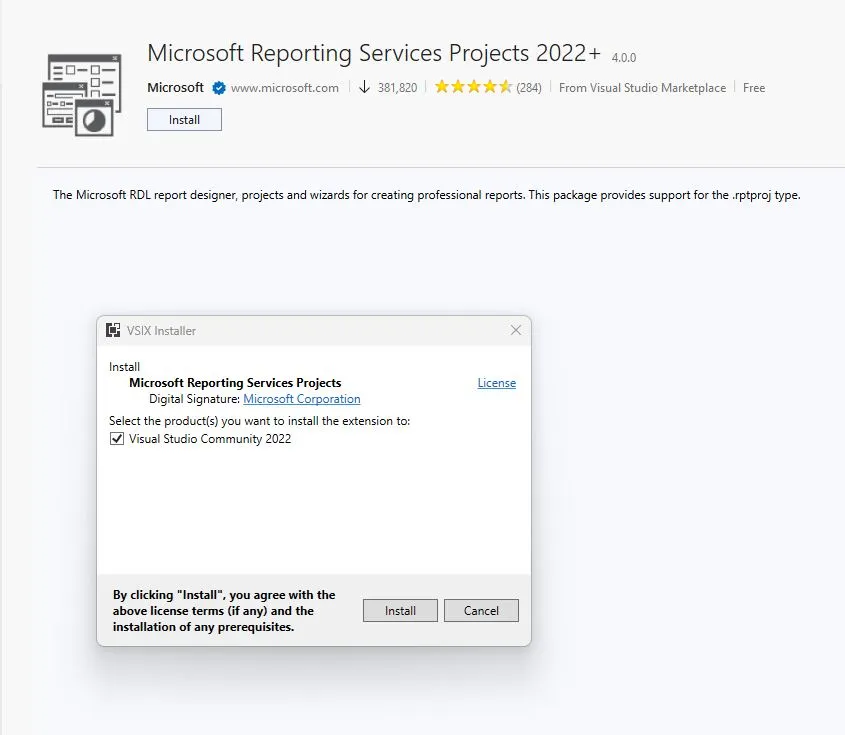
Step C Reporting Services Projects Extension
- Go to:
Extensions → Manage Extensions - Search:
Microsoft Reporting Services Projects 2022+ - Download and run the VSIX installer
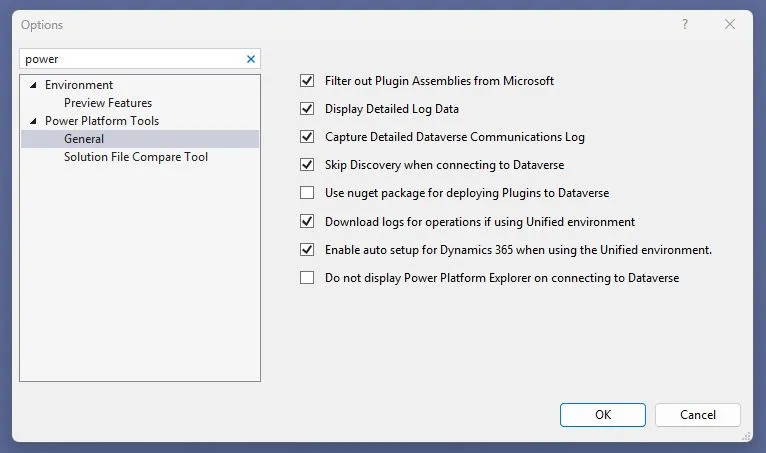
Step D Power Platform Tools Extension
- Go to:
Extensions → Manage Extensions - Install:
Power Platform Tools for VS - After install:
Tools → Options → PowerPlatform Tools → General→ enable all checkboxes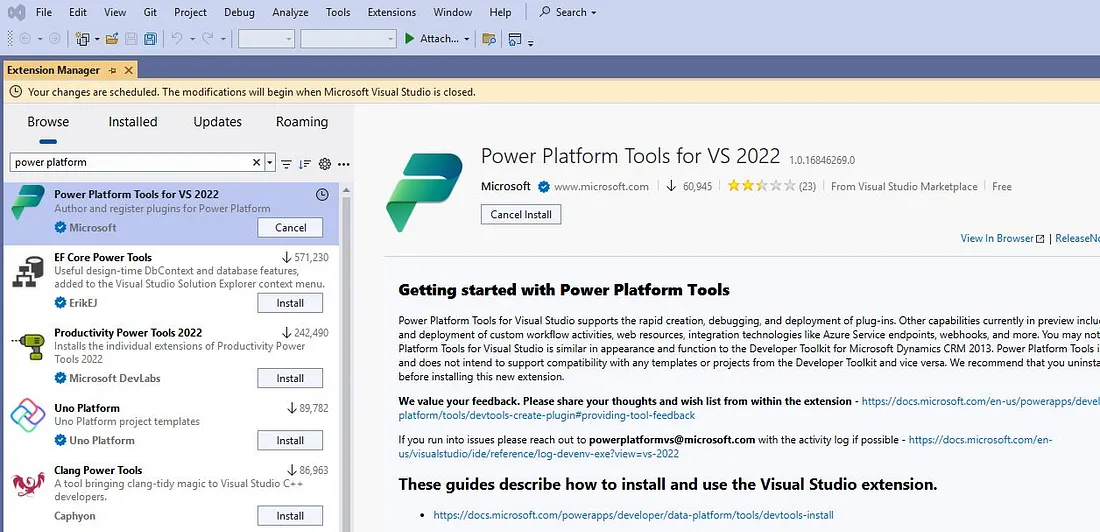
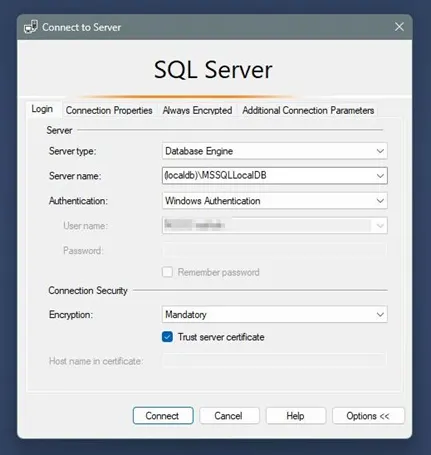
Step E Verify Local SQL Connection
- Open SSMS
- Connect using server name:
(localdb)\MSSQLLocalDB - Authentication:
Windows Authentication - Confirm connection works before moving on
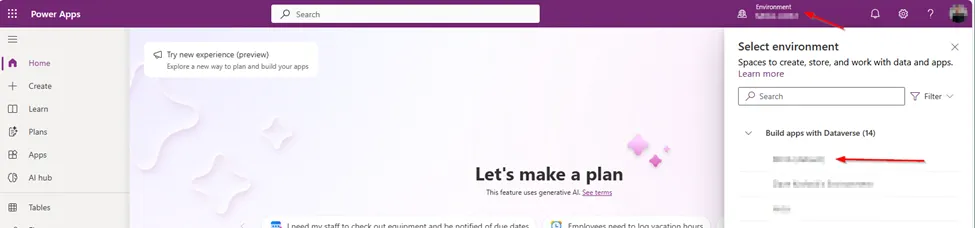
Phase 2 Provision the UDE Environment in PPAC
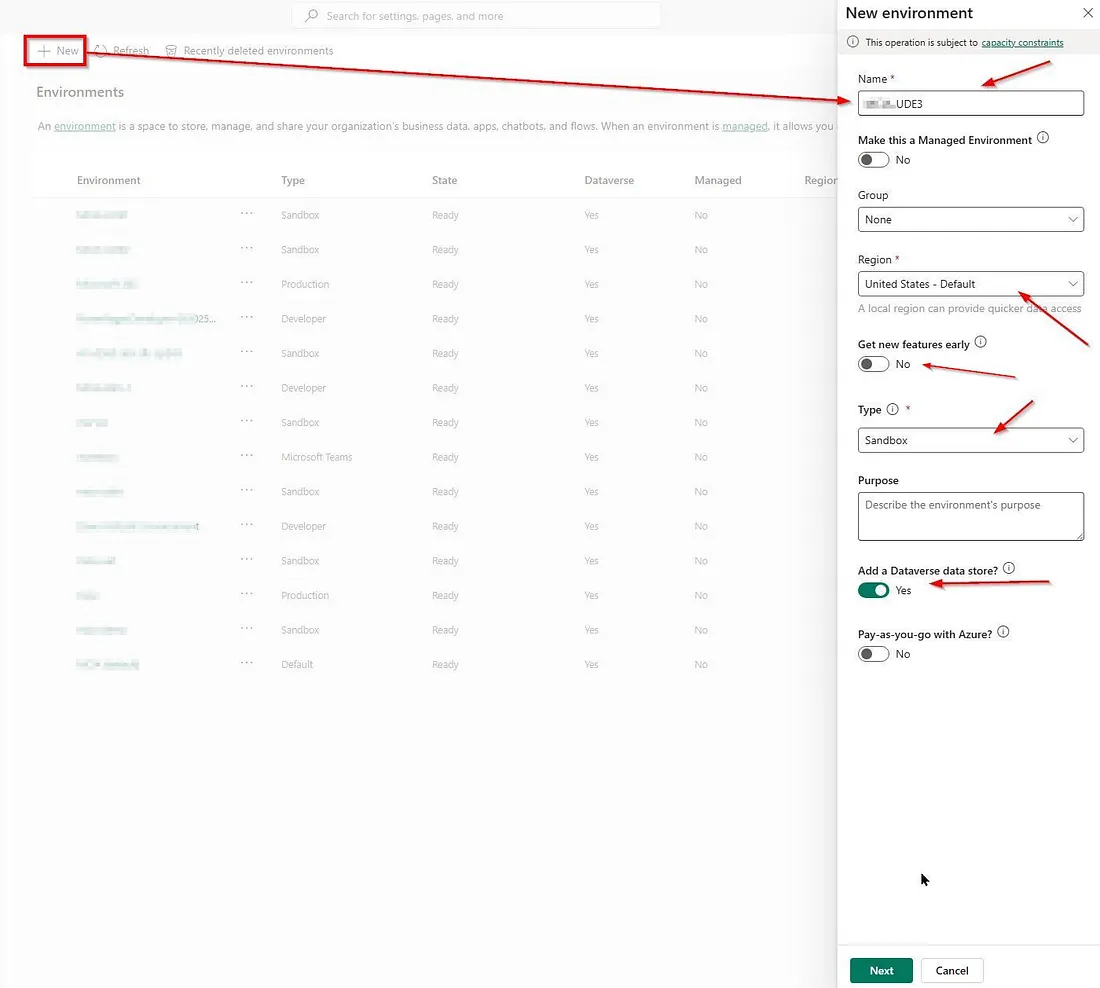
Sign in to PPAC and click the New button. Configure the basic settings as below:
Step 2.1 Create the Environment Shell
Click New and fill in:
| Setting | Value |
|---|---|
| Name | e.g. DEV-UDE-01 |
| Managed Environment | No |
| Region | Same as your other environments |
| Type | Sandbox |
| Add Dataverse data store | Yes |
Click Next.
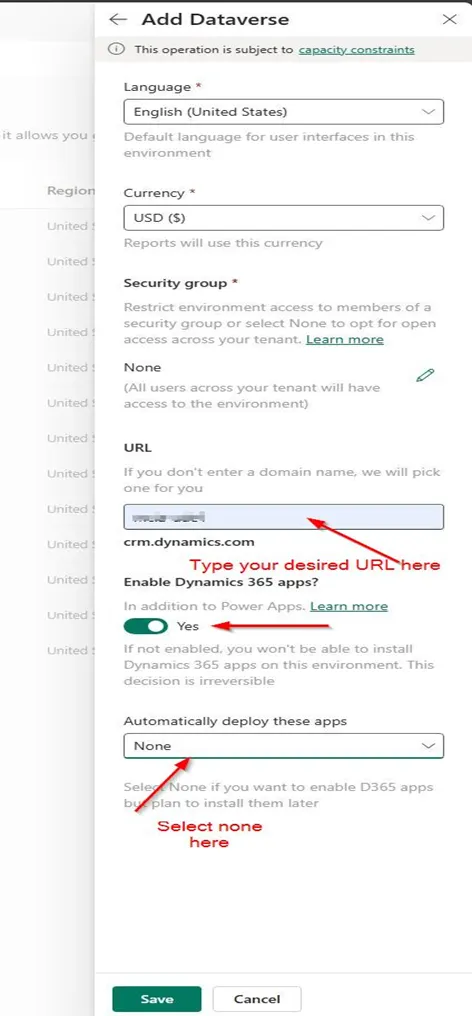
Step 2.2 Configure Dataverse
| Setting | Value |
|---|---|
| Language | English (US) or your preference |
| Currency | USD or your reporting currency |
| Security group | None (or select a specific group) |
| URL | Enter your desired URL (or MS auto-assigns one) |
| Enable Dynamics 365 apps | Yes — critical! |
| Auto-deploy apps | None (or select templates like Finance/SCM) |
Click Save. Wait 1–2 minutes.
At this point you'll only have a CRM URL. The F&O URL comes later.
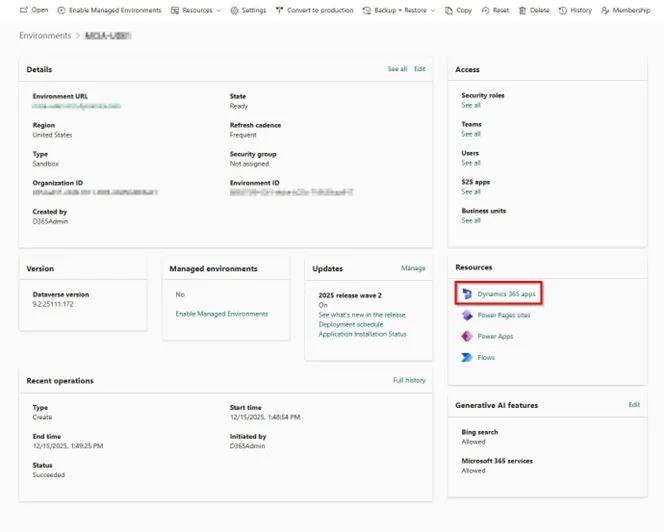
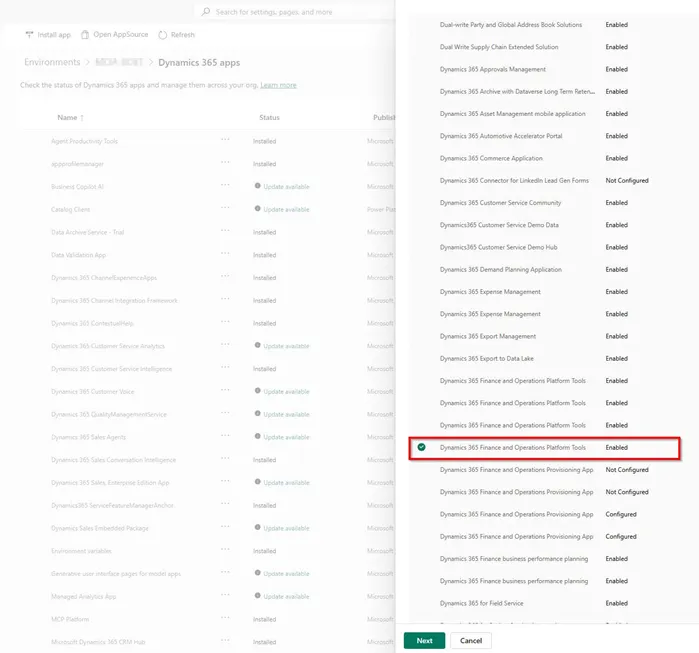
Step 2.3 Install Platform Tools
- From environment details: click
Dynamics 365 appsunder Resources - Click
Install app→ select Dynamics 365 Finance and Operations Platform Tools - Wait: ~10–15 minutes
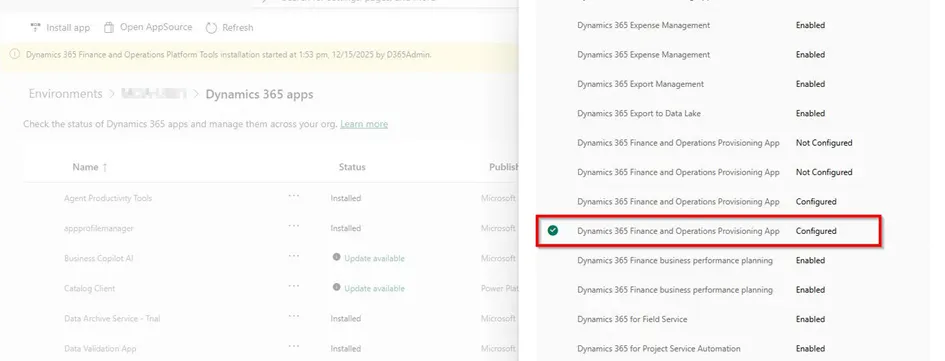
Step 2.4 Install the Provisioning App ⚠️ Critical Step
- Click
Install app→ find Dynamics 365 Finance and Operations Provisioning App - Click Next and configure:
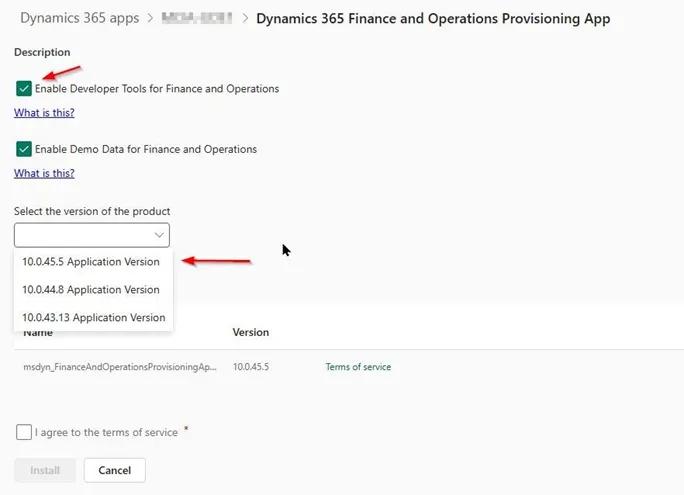
| Setting | Action |
|---|---|
| Enable Developer Tools for Finance and Operations | ✅ CHECK THIS — mandatory |
| Enable Demo Data | Optional (Contoso sample data) |
| Product version | Choose your platform version |
Click Install. Wait: ~60–90 minutes.
Without checking "Enable Developer Tools", Visual Studio cannot connect to your environment.
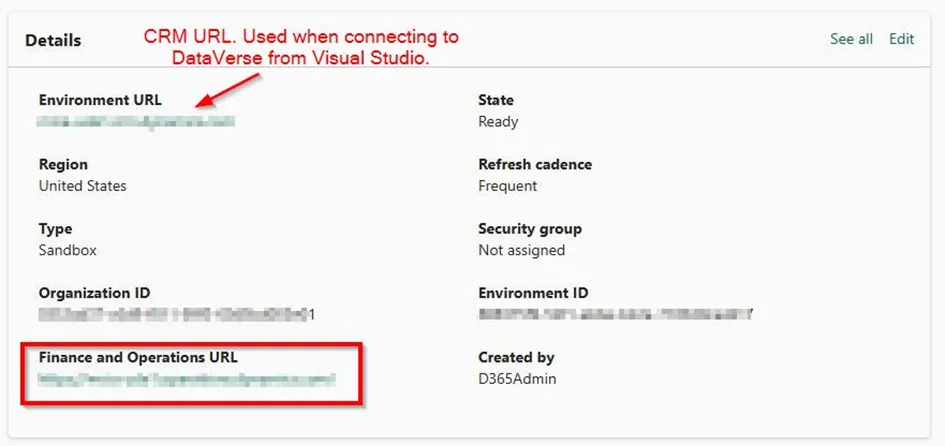
Step 2.5 Verify Both URLs Are Active
Once done, your environment details page should show:
- Environment URL:
https://yourcompany-ude1.crm.dynamics.com - Finance and Operations URL:
https://yourcompany-ude1.operations.dynamics.com
Both must be active. Your UDE environment is ready.
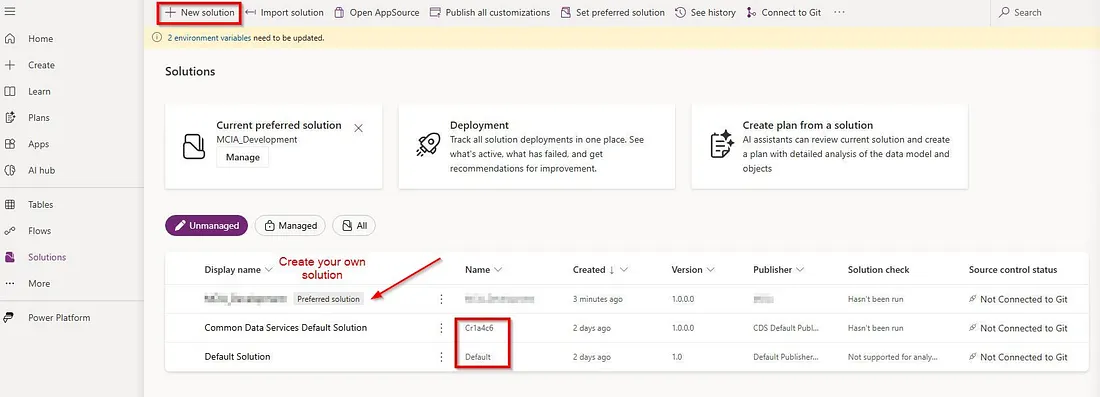
Step 2.6 Create a Custom Solution (Recommended)
- Go to make.powerapps.com
- Select your new environment
- Click Solutions on the left → create a new solution
This makes it easier to package and move objects later. Skip if you want to use the default Microsoft solution.
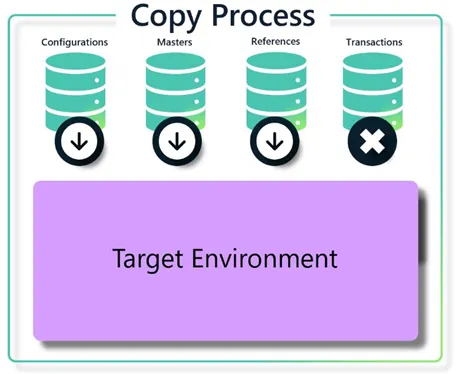
Phase 3 Copy Data Into Your Environment
A dev environment without data isn't useful. Use one of two methods:
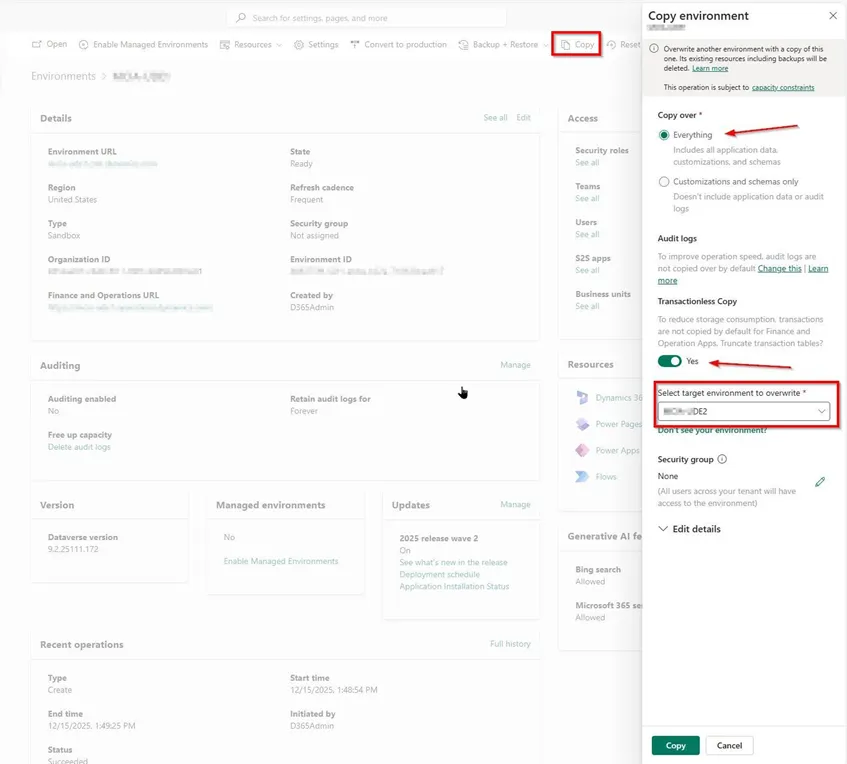
Option A — PPAC Copy (UI)
- In PPAC, open your source environment → click Copy
- Choose copy type:
- Everything — full copy (data + customizations + schema)
- Customizations and schema only — structure only, no transactional data
- Select target environment → click Copy
⚠️ The target environment will be completely overwritten.
Option B PowerShell Script
# Install module once (run as Administrator)
Install-Module -Name Microsoft.PowerApps.Administration.PowerShell

# Sign in
Add-PowerAppsAccount -Endpoint prod

# Set environment IDs (from PPAC)
$sourceEnvId = "your-source-env-id"
$targetEnvId = "your-target-env-id"

# Build copy request
$copyRequest = [PSCustomObject]@{
    SourceEnvironmentId = $sourceEnvId
    CopyType = "FullCopy"
    SkipAuditData = $true
    ExecuteAdvancedCopyForFinanceAndOperations = $true
}

# Execute copy
Copy-PowerAppEnvironment -EnvironmentName $targetEnvId -CopyToRequestDefinition $copyRequest
Transactionless Copy (TLC): Copies master data, config, and customizations — skips historical transactions. Useful for a clean dev environment.
Phase 4 Connect Visual Studio to Your UDE
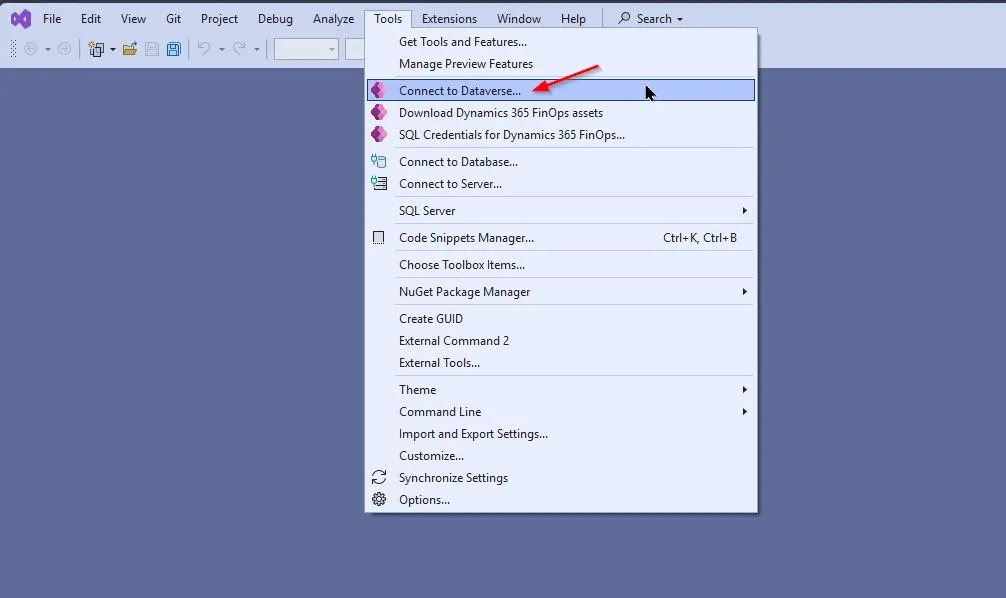
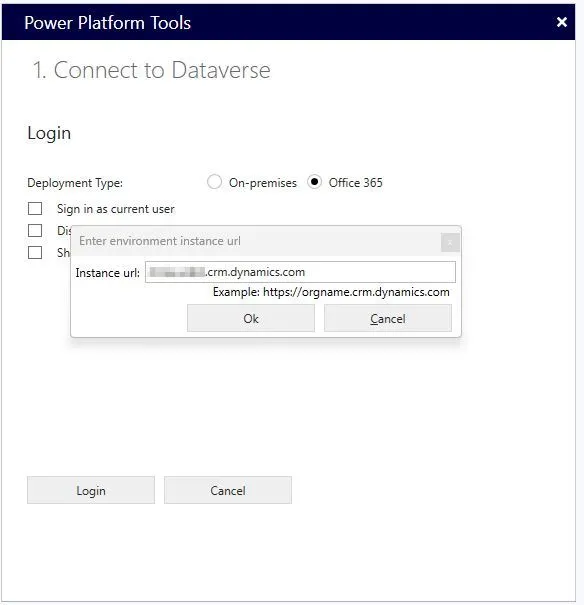
Step 4.1 Initial Connection
- In Visual Studio:
Tools → Connect to Dataverse - In the Power Platform Tools window: click Login
- Enter your CRM URL (not the F&O URL!)
- Authenticate and select your custom solution → click Done
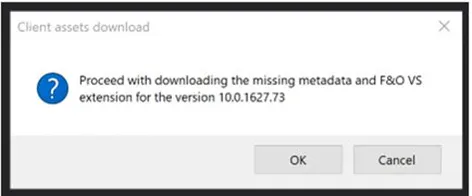
Step 4.2 Download Metadata
- A dialog will prompt to download missing metadata — click OK
- What happens:
- Platform metadata (several GB) downloads locally
- Cross-reference database is created in LocalDB
- VS extension for F&O is configured
| Connection | Time |
|---|---|
| First time | 15–30 minutes |
| Subsequent connections | 1–2 minutes (cached) |
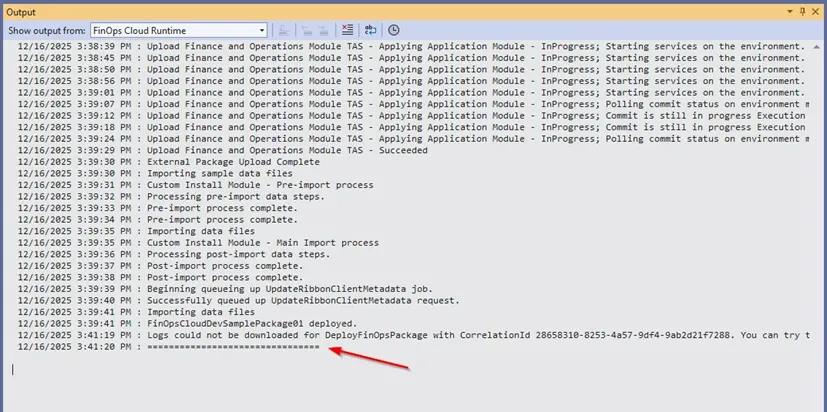
Monitor progress in: Output window → FinOps Cloud Runtime
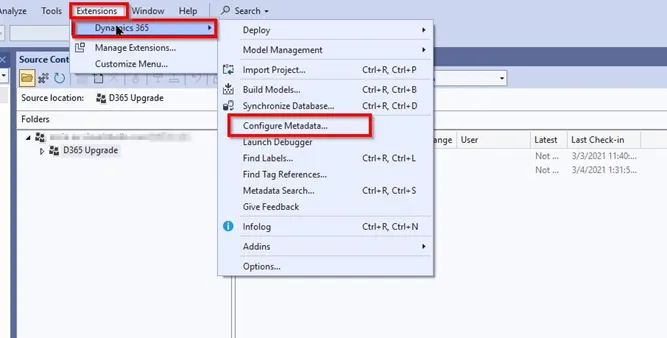
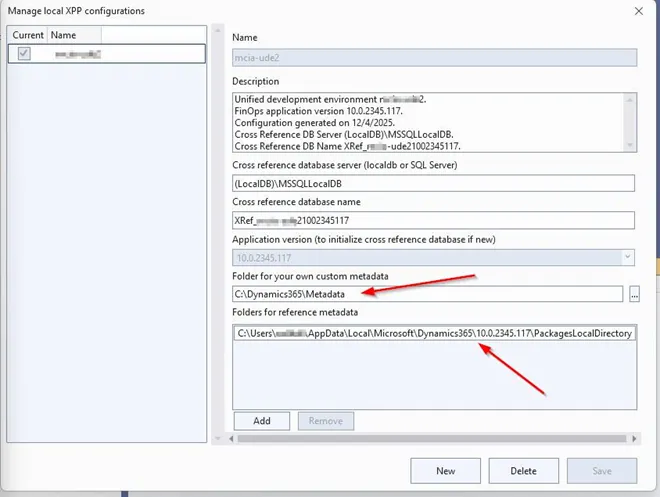
Step 4.3 Configure Metadata Path
After download, set your custom metadata path for your custom model. Reference metadata stays in the default location.
Phase 5 Source Control Setup (TFVC / Azure DevOps)
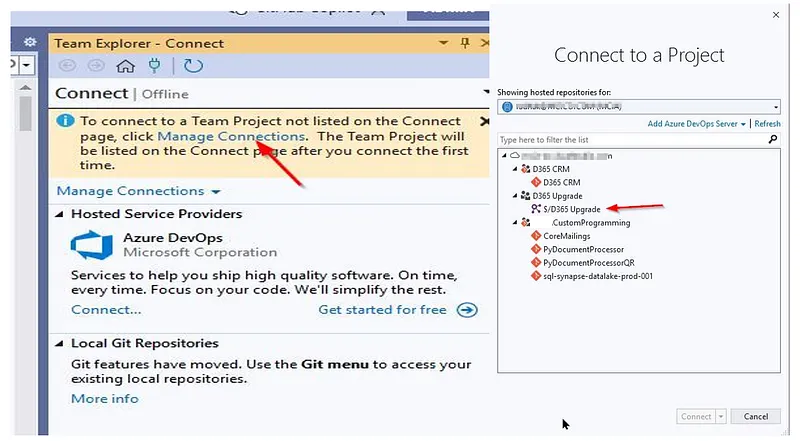
Step 5.1 Connect to Azure DevOps
- Go to:
View → Team Explorer → Manage Connections - Under "Hosted Service Providers" → click Connect next to Azure DevOps
- Select your organization and project → click Connect
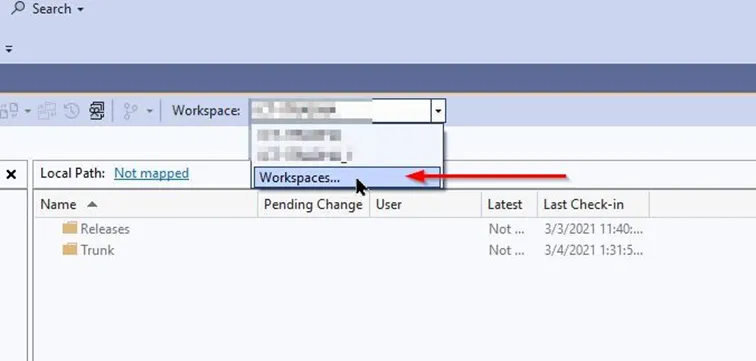
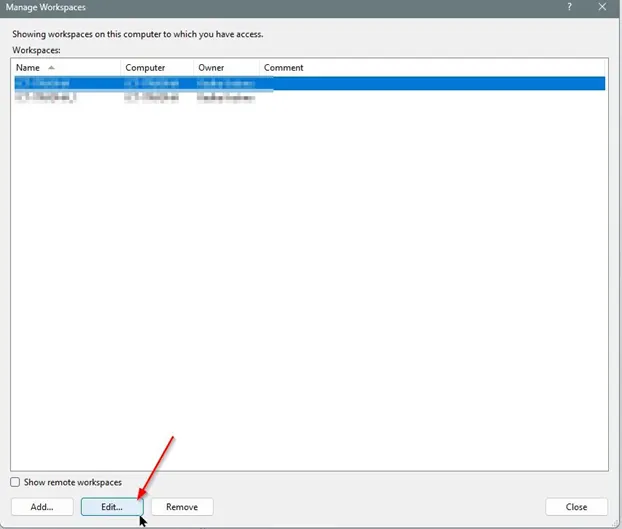
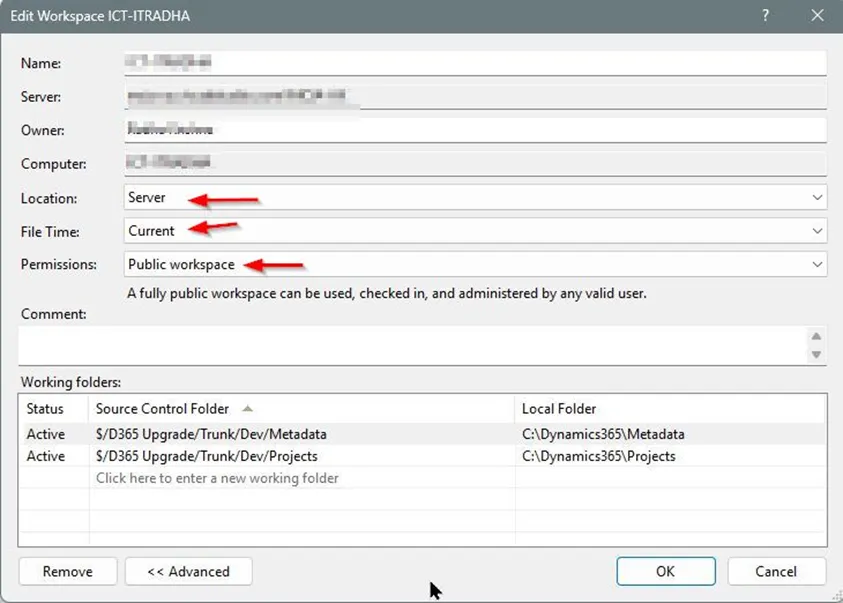
Step 5.2 Map Workspace Folders
- In Team Explorer: click Workspaces → Edit
- Map your source control folders to local folders
- Set Location, File Time, and Permissions
Step 5.3 First Build and Sync
- Get the latest version of your code from source control
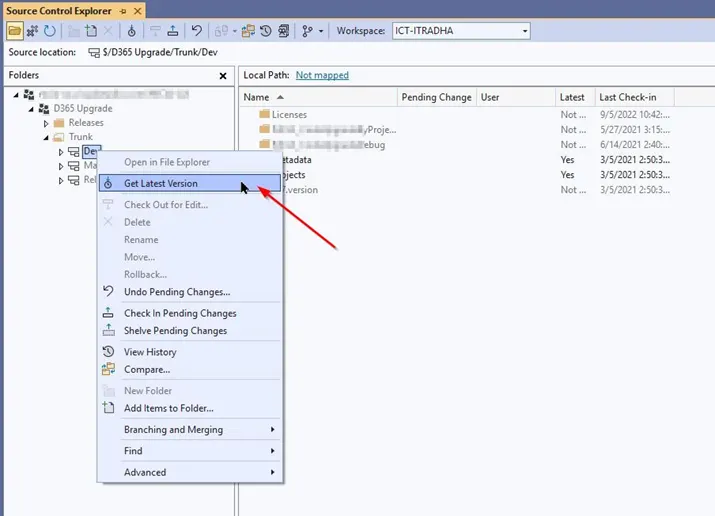
- Build in dependency order:
ISVModel1 → ISVModel2 → ISVModel3 → YourCustomModel
- After building:
Extensions → Dynamics 365 → Synchronize Database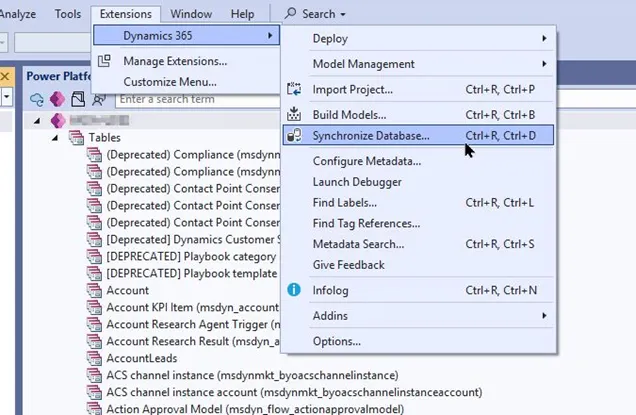
Phase 6 Deploy, Debug, and Database Access
Step 6.1 Deploy Your Changes
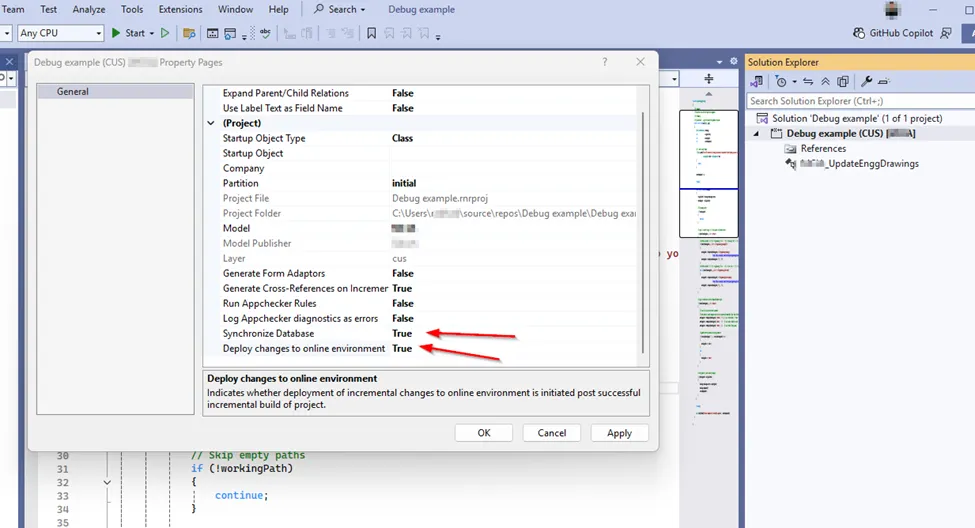
Option A Deploy Project Only (quick iterations)
- Right-click your project → Properties
- Set
Deploy changes to online environmentto True - Build the project — changes auto-deploy
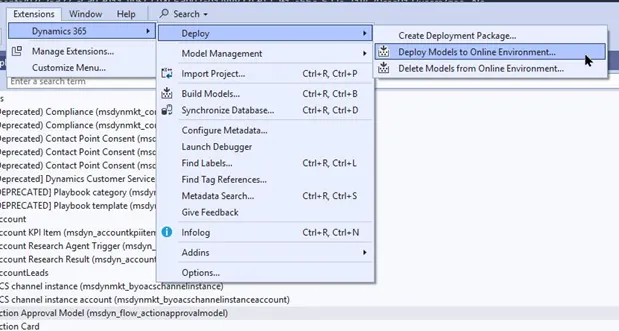
Option B Deploy Entire Model
Extensions → Dynamics 365 → Deploy → Deploy Models to Online Environment- Select models to deploy
- Check DBSync if database changes are included
Step 6.2 Debug Configuration
Extensions → Dynamics 365 → Options → Debugging- Enable:
Debug items in the solution and items in specific packages - Select packages to load symbols for:
ApplicationFoundationApplicationPlatform

- Set breakpoints →
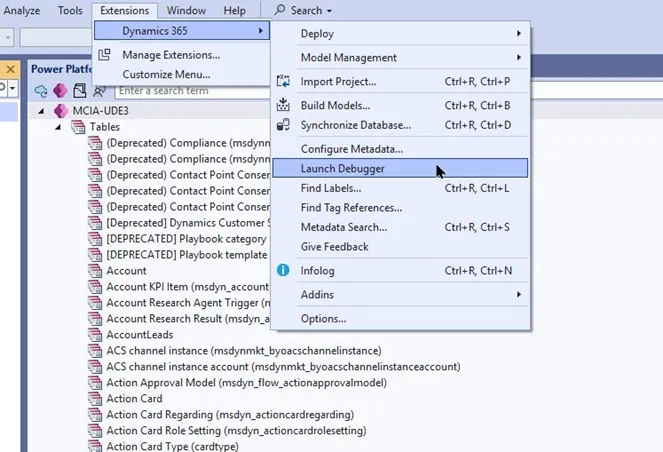
Extensions → Dynamics 365 → Launch Debugger
Debugging is fast in UDE because Visual Studio runs locally.
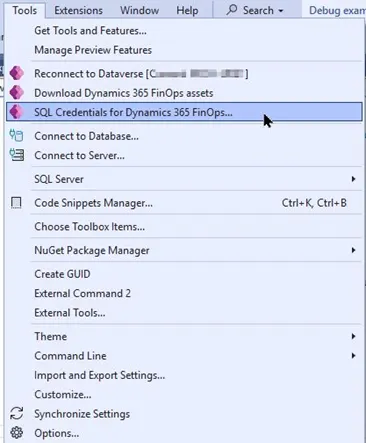
Step 6.3 JIT Database Access (SSMS)
To access the cloud DB directly from SSMS:
- Go to:
Tools → SQL Credentials for Dynamics 365 FinOps
- Fill in:
- Reason: e.g. "Testing" or "Data validation"
- SQL User Role: Writer (INSERT/UPDATE) or Reader (SELECT only)
- IP v4 Address Range: Your IP or CIDR range
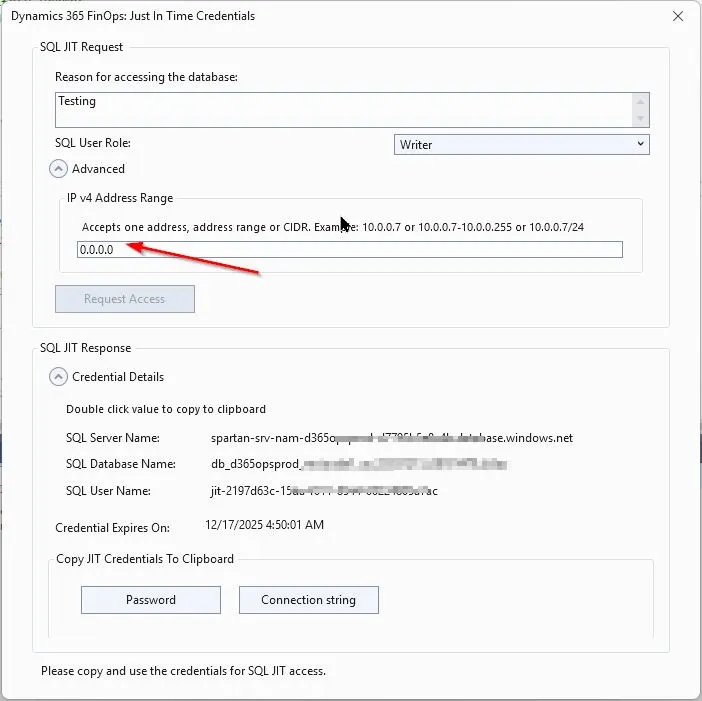
⚠️ JIT access is valid for 12 hours only. Unlike LCS, it does not support multiple individual IPs — use a CIDR range instead.
Key Takeaways
| # | Rule |
|---|---|
| 1 | Always check Enable Developer Tools during provisioning — nothing works without it |
| 2 | Use the CRM URL when connecting Visual Studio, not the F&O URL |
| 3 | Budget 30+ minutes for the first metadata download |
| 4 | Build ISV models before your custom model to avoid dependency errors |
| 5 | JIT DB access expires after 12 hours — re-request as needed |
References
- Microsoft Learn — Unified Admin Experience for F&O
- Anthony Blake — Dynamics 365 F&O: Configure Visual Studio for Unified Development
- Alex Meyer — My Experience Moving D365FSC Development From CHE to UDE
- Adrià Ariste — D365 ALM Guide
- Aurélien — Dynamics 365 FinOps Unified Developer Experience
- Radha Krishna M Ramisetty - Goodbye LCS: Setting Up the Unified Developer Experience